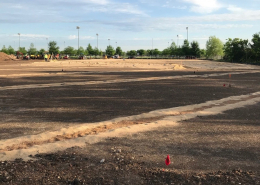
 Photo compliments of Dan Bergstrom of BBVA Compass Stadium in Houston
https://thomasturf.com/wp-content/uploads/2021/06/sand-cap-Dan-Bergstrom-of-BBVA-compass-stadium-1.jpg
1280
960
objectif
https://thomasturf.com/wp-content/uploads/2019/02/thomasturf-logo.jpg
objectif2021-06-15 03:25:152021-06-15 03:26:38Sand capping – by James C. Thomas C.P.Ag.Photo compliments of Dan Bergstrom of BBVA Compass Stadium in Houston
https://thomasturf.com/wp-content/uploads/2019/02/thomasturf-logo.jpg
0
0
webmestre
https://thomasturf.com/wp-content/uploads/2019/02/thomasturf-logo.jpg
webmestre2019-03-14 07:42:042019-03-14 07:42:04Sand SelectionPhoto compliments of Dan Bergstrom of BBVA Compass Stadium in Houston
https://thomasturf.com/wp-content/uploads/2019/02/thomasturf-logo.jpg
0
0
webmestre
https://thomasturf.com/wp-content/uploads/2019/02/thomasturf-logo.jpg
webmestre2019-03-14 07:40:032019-03-14 07:45:22Soil ConditionsPhoto compliments of Dan Bergstrom of BBVA Compass Stadium in Houston
https://thomasturf.com/wp-content/uploads/2019/02/thomasturf-logo.jpg
0
0
webmestre
https://thomasturf.com/wp-content/uploads/2019/02/thomasturf-logo.jpg
webmestre2019-03-14 07:37:312019-03-14 07:37:38Water QualityPhoto compliments of Dan Bergstrom of BBVA Compass Stadium in Houston
https://thomasturf.com/wp-content/uploads/2019/02/thomasturf-logo.jpg
0
0
webmestre
https://thomasturf.com/wp-content/uploads/2019/02/thomasturf-logo.jpg
webmestre2019-03-14 07:34:532019-03-14 07:44:04Physical propertiesPhoto compliments of Dan Bergstrom of BBVA Compass Stadium in Houston
https://thomasturf.com/wp-content/uploads/2019/02/thomasturf-logo.jpg
0
0
webmestre
https://thomasturf.com/wp-content/uploads/2019/02/thomasturf-logo.jpg
webmestre2019-03-14 07:28:532019-03-14 07:43:47Fairaway SoilPhoto compliments of Dan Bergstrom of BBVA Compass Stadium in Houston
https://thomasturf.com/wp-content/uploads/2019/02/thomasturf-logo.jpg
0
0
webmestre
https://thomasturf.com/wp-content/uploads/2019/02/thomasturf-logo.jpg
webmestre2019-03-14 07:23:592019-03-14 07:43:28LayeringPhoto compliments of Dan Bergstrom of BBVA Compass Stadium in Houston
https://thomasturf.com/wp-content/uploads/2019/02/thomasturf-logo.jpg
0
0
webmestre
https://thomasturf.com/wp-content/uploads/2019/02/thomasturf-logo.jpg
webmestre2019-03-14 07:14:352019-03-14 07:42:34Bunker Sand
Photo compliments of Dan Bergstrom of BBVA Compass Stadium in Houston
https://thomasturf.com/wp-content/uploads/2021/06/sand-cap-Dan-Bergstrom-of-BBVA-compass-stadium-1.jpg
1280
960
objectif
https://thomasturf.com/wp-content/uploads/2019/02/thomasturf-logo.jpg
objectif2021-06-15 03:25:152021-06-15 03:26:38Sand capping – by James C. Thomas C.P.Ag.Photo compliments of Dan Bergstrom of BBVA Compass Stadium in Houston
https://thomasturf.com/wp-content/uploads/2019/02/thomasturf-logo.jpg
0
0
webmestre
https://thomasturf.com/wp-content/uploads/2019/02/thomasturf-logo.jpg
webmestre2019-03-14 07:42:042019-03-14 07:42:04Sand SelectionPhoto compliments of Dan Bergstrom of BBVA Compass Stadium in Houston
https://thomasturf.com/wp-content/uploads/2019/02/thomasturf-logo.jpg
0
0
webmestre
https://thomasturf.com/wp-content/uploads/2019/02/thomasturf-logo.jpg
webmestre2019-03-14 07:40:032019-03-14 07:45:22Soil ConditionsPhoto compliments of Dan Bergstrom of BBVA Compass Stadium in Houston
https://thomasturf.com/wp-content/uploads/2019/02/thomasturf-logo.jpg
0
0
webmestre
https://thomasturf.com/wp-content/uploads/2019/02/thomasturf-logo.jpg
webmestre2019-03-14 07:37:312019-03-14 07:37:38Water QualityPhoto compliments of Dan Bergstrom of BBVA Compass Stadium in Houston
https://thomasturf.com/wp-content/uploads/2019/02/thomasturf-logo.jpg
0
0
webmestre
https://thomasturf.com/wp-content/uploads/2019/02/thomasturf-logo.jpg
webmestre2019-03-14 07:34:532019-03-14 07:44:04Physical propertiesPhoto compliments of Dan Bergstrom of BBVA Compass Stadium in Houston
https://thomasturf.com/wp-content/uploads/2019/02/thomasturf-logo.jpg
0
0
webmestre
https://thomasturf.com/wp-content/uploads/2019/02/thomasturf-logo.jpg
webmestre2019-03-14 07:28:532019-03-14 07:43:47Fairaway SoilPhoto compliments of Dan Bergstrom of BBVA Compass Stadium in Houston
https://thomasturf.com/wp-content/uploads/2019/02/thomasturf-logo.jpg
0
0
webmestre
https://thomasturf.com/wp-content/uploads/2019/02/thomasturf-logo.jpg
webmestre2019-03-14 07:23:592019-03-14 07:43:28LayeringPhoto compliments of Dan Bergstrom of BBVA Compass Stadium in Houston
https://thomasturf.com/wp-content/uploads/2019/02/thomasturf-logo.jpg
0
0
webmestre
https://thomasturf.com/wp-content/uploads/2019/02/thomasturf-logo.jpg
webmestre2019-03-14 07:14:352019-03-14 07:42:34Bunker Sand